Begin by pouring 1.5 liters of milk into a large saucepan. Place the saucepan over medium heat and let the milk warm, stirring occasionally to prevent scorching. You don’t want the milk to boil; simply heat it until it’s hot and steaming, just below the boiling point. This usually takes 5 to 6 minutes, depending on your stovetop.
Add the vinegar:
Once the milk is hot, remove the saucepan from the heat. Add the 2 tablespoons of apple cider vinegar to the milk, stirring continuously. You’ll notice the milk begins to curdle almost immediately. The vinegar causes the milk proteins to separate into curds (solids) and whey (liquids). Continue stirring for another minute to ensure the vinegar is evenly distributed and the curdling process is complete.
Strain the curds:
Place a clean cheesecloth or tea towel over a fine-mesh strainer. Carefully pour the curdled milk through the strainer to separate the curds from the whey. Let it sit for a few minutes to allow as much whey as possible to drain. The curds left in the tea towel are your fresh cheese.
Add the butter and seasonings:
Transfer the curds to a bowl. Add the melted butter to the curds, which will give the cheese a rich, creamy texture. Mix well until the butter is fully incorporated. At this point, you can also add salt to taste. If using herbes de Provence or any other seasonings, mix them in now. These herbs give the cheese a wonderful aromatic flavor, making it perfect for spreading on bread or adding to salads.
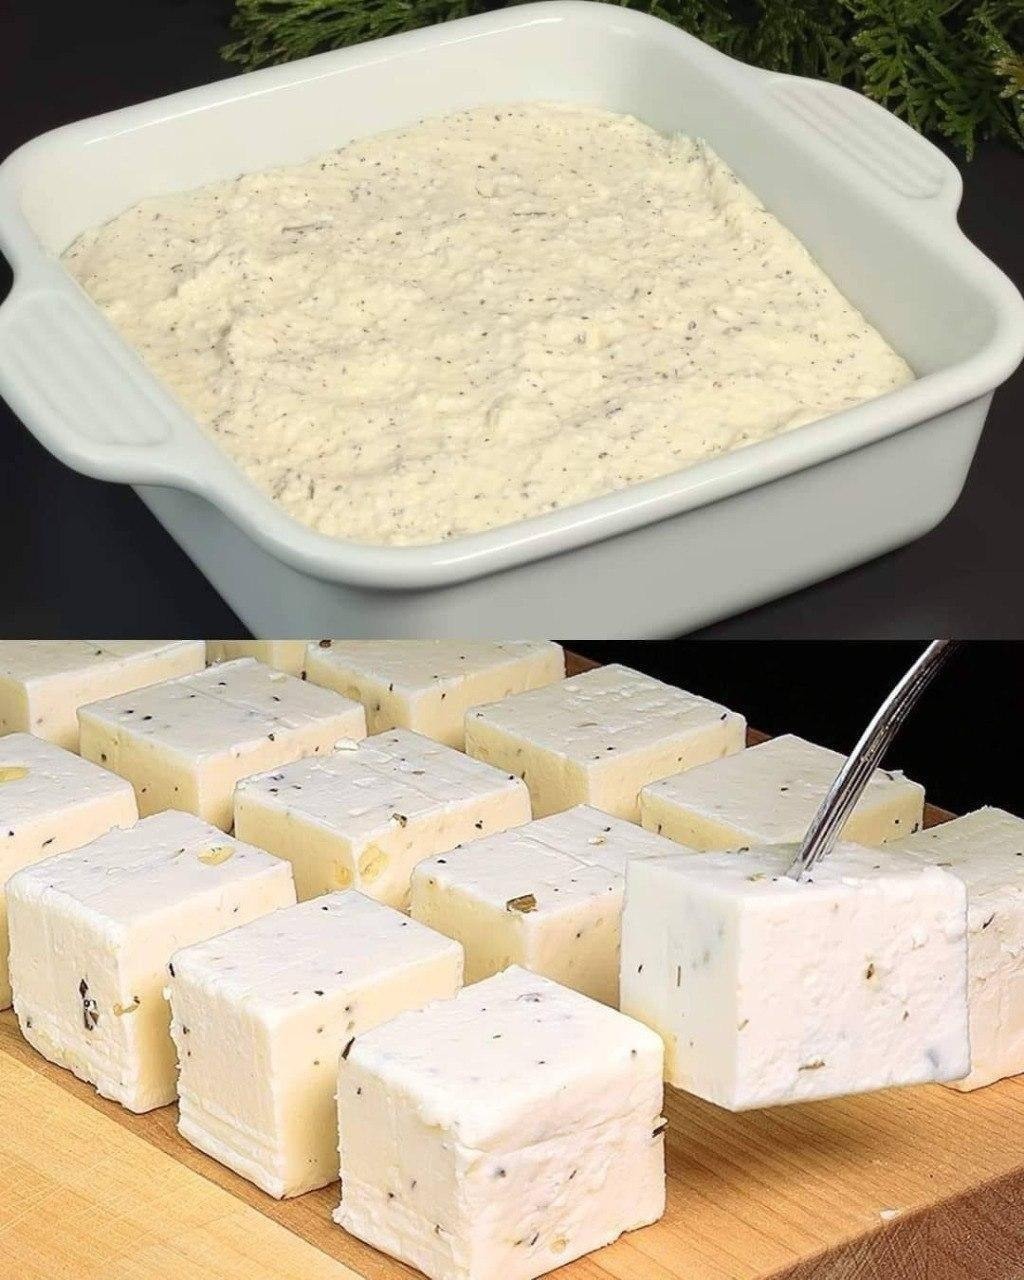
Shape and chill:
After mixing, you can shape the cheese as you prefer, either round or flat. If you prefer a firmer cheese, you can press the curd into a mold or small container, cover it with a cloth, and place a weight on top. Let the cheese rest at room temperature for at least 30 minutes to firm up slightly. For a softer, spreadable cheese, you can skip this step and enjoy it right away.
Serve and enjoy:
your homemade cheese is ready to eat! Slice it, spread it, or crumble it over your favorite dishes. This cheese is incredibly versatile and can be used in a variety of recipes or simply enjoyed on its own with some herbs or a drizzle of olive oil.
Cooking tips:
Milk Quality: The quality of milk you use will significantly impact the final product. Whole milk produces a creamier, smoother cheese, while low-fat milk will result in a slightly drier texture.
Herb Variations: While herbes de Provence are a great choice, experiment with different herbs and spices like dill, chives, or even chili flakes to customize the flavor of your cheese.
Whey Uses: Don’t throw away the whey! It’s packed with nutrients and can be used in smoothies, soups, or even as a liquid for baking bread.
Nutritional benefits:
High in protein: This homemade cheese is rich in protein, making it a great addition to any diet, especially for those looking to increase their protein intake.
High in calcium: Cheese is an excellent source of calcium, essential for maintaining strong bones and teeth.
No preservatives: Unlike many commercial cheeses, this homemade version contains no preservatives or artificial additives, making it a healthier choice.
Why you’ll love this recipe.
Simplicity: With just two main ingredients and minimal time, this recipe is incredibly easy. It requires no special equipment or complicated techniques.
Customizable: Whether you prefer plain or flavored cheese, this recipe allows you to tailor it to your taste. Add herbs, spices, or even a touch of honey for a sweet note.
Freshness: There’s nothing like the taste of homemade fresh cheese. It’s creamy, rich, and free of the artificial flavors and additives often found in commercial cheeses.
Cost-effective: Making your own cheese at home is economical, especially compared to buying specialty cheeses at the store. Plus, you’ll have the satisfaction of creating something delicious from scratch.
Nutritional information:
Vegetarian: This cheese is suitable for vegetarians as it contains no animal rennet.
Gluten-free: The recipe is naturally gluten-free, making it safe for people with gluten intolerance or celiac disease.
Low-carb: With no added sugars or carbohydrates, this cheese fits well into low-carb or ketogenic diets.
Adaptable to dietary needs: If you are lactose intolerant, you can experiment with lactose-free milk to make this cheese. You can also adjust the salt or even omit it for a lower-sodium version.
Why does this recipe work?
The magic of this recipe lies in the chemical reaction between milk and vinegar. By adding acid to warm milk, the milk proteins coagulate and form curds, the building blocks of cheese. Adding butter enhances the texture, resulting in a smooth and creamy cheese, while optional herbs add a touch of flavor. The simplicity of this method allows anyone to make fresh cheese with minimal effort, and the results are always delicious.
Conclusion :
This quick and easy cheese recipe proves that sometimes the simplest recipes yield the best results. With just milk and vinegar, you can make fresh, creamy cheese in minutes. Whether you’re looking for a new culinary adventure or simply want to enjoy the taste of homemade cheese, this recipe is perfect to get started. It’s versatile, healthy, and incredibly rewarding. Why not give it a try? You’ll be surprised how easy it is to make delicious homemade cheese in your own kitchen. Happy cheesemaking!
