100g of finely chopped white chocolate – Quality white chocolate adds touches of refined sweetness and visual elegance. It should be fine chocolate for best results.
Whipped Chantilly cream to stiff peaks – The Chantilly cream crowns the cake with lightness and freshness, balancing the richness of the cream. It is whipped to medium-firm peaks to maintain its shape.
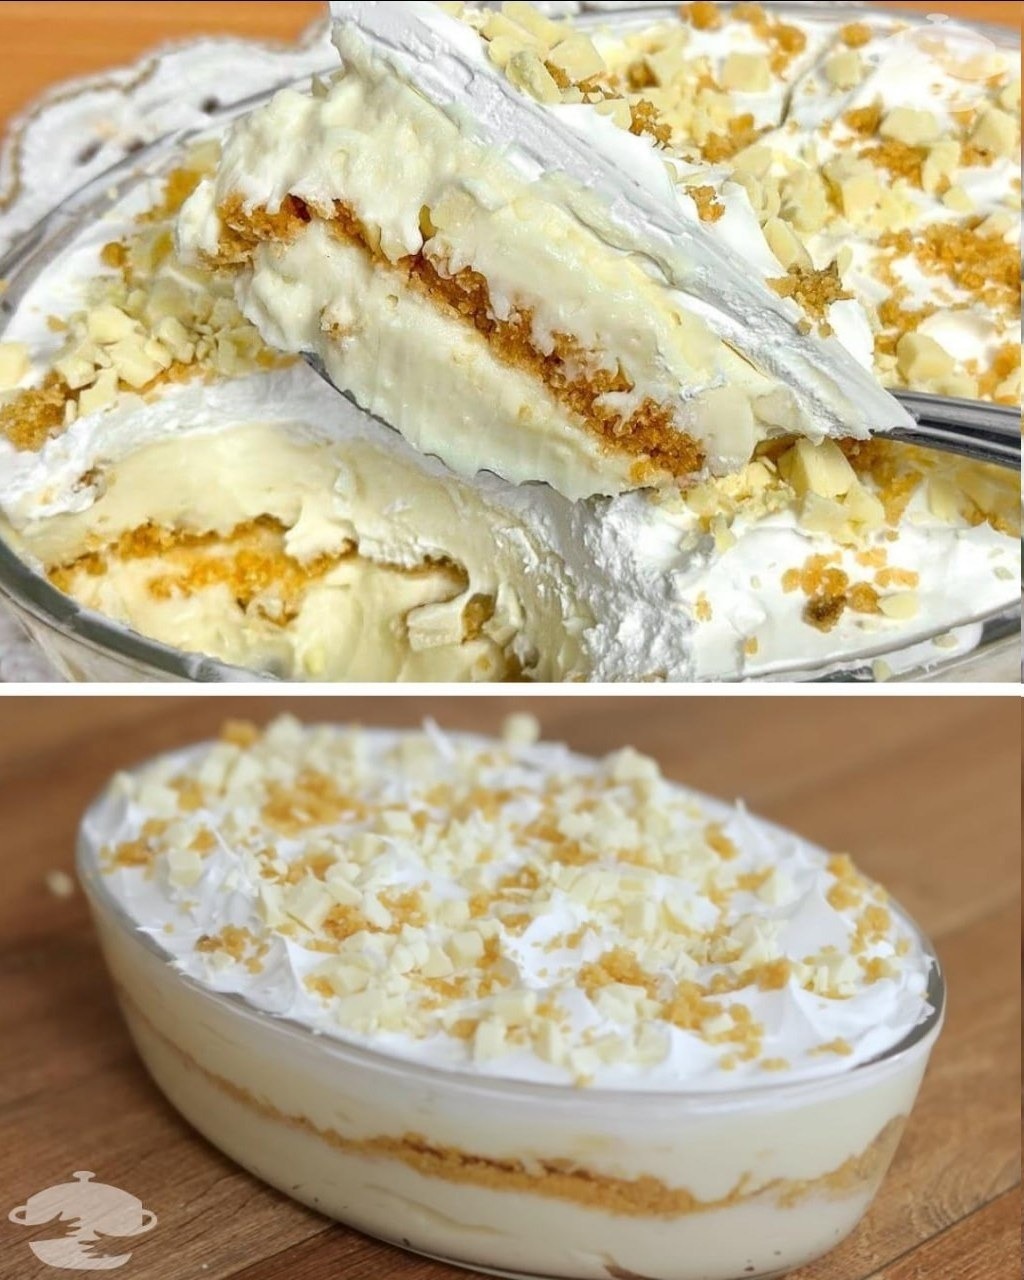
Preparation
of the Four-Milk Cream
Step 1: In a medium-sized, heavy-bottomed saucepan, combine the cornstarch, powdered milk, and the entire can of sweetened condensed milk. Using a whisk, vigorously mix these three ingredients for approximately two minutes. It is crucial that the cornstarch and powdered milk dissolve completely in the sweetened condensed milk, leaving no visible lumps. The mixture should have a smooth, slightly thickened consistency.
Step 2: Once the initial ingredients are thoroughly combined, add the 200 ml of coconut milk, the entire carton of heavy cream, and the 400 ml of whole milk. Gently mix with a whisk, using soft, folding motions to incorporate everything without creating excessive bubbles. The mixture will now have a liquid consistency and a uniform creamy white color.
Step 3: Place the pot over medium heat and begin stirring constantly with a whisk or wooden spoon. It is essential to stir continuously to prevent lumps from forming or the cream from sticking to the bottom of the pot. Stir constantly, covering the entire bottom and sides of the pot. You will notice the mixture gradually thickening, a process that will take between 8 and 12 minutes depending on the heat.
Step 4: When the cream reaches a boil and you’ve achieved a thick consistency that coats the back of a spoon without immediately running off, reduce the heat to low. Continue cooking for an additional two minutes, stirring constantly. This extra time allows the cornstarch to fully cook and eliminates any raw flavor. The cream is ready when, upon running your finger across the back of a spoon coated with cream, the line remains distinct without the liquid running back together.
Step 5: Remove the pot from the heat and transfer the cream to a clean container. Cover the surface directly with plastic wrap to prevent a skin from forming. Let it cool to room temperature for 15 minutes before using. If you are not going to use it immediately, refrigerate until ready to assemble.
Preparation of the Cookie Farofa
Step 1: Place the 130 grams of milk cookies in a food processor. If you don’t have a food processor, you can place the cookies in a heavy-duty plastic bag and crush them with a rolling pin or a heavy glass. Process or crush until you obtain a texture that resembles coarse sand. Some crumbs can be finer and others slightly larger, which is perfect for creating an interesting texture.
Step 2: Melt the two tablespoons of butter in the microwave for 20 to 30 seconds, or in a small saucepan over low heat until completely liquid. Pour the melted butter over the crushed cookies in a bowl.
Step 3: Mix the butter with the cookies using a fork or spatula, pressing lightly to ensure all the crumbs are coated with the butter. The farofa is ready when all the crumbs are moistened and a uniform golden color. It should have a texture similar to wet sand that compacts slightly when pressed. Set aside until assembly.
